Google Tag Manager isn’t a new thing. This free and user-friendly tool has been around since 2005. The sad thing, however, is that a lot of us are still not familiar with it and the way it’s used.
In this post, we’ll discuss what Google Tag Manager is and how you can optimize your Google Tag Manager. We’ll also have a quick look at the benefits of using Google Tag Manager and how to set it up for your business.
If you’re interested in learning about it, let’s get started.
Table of Contents:
- What is Google Tag Manager
- Benefits of Using Google Tag Manager
- How to Set up Google Tag Manager
- How to Optimize Google Tag Manager
What is Google Tag Manager
Before we discuss what Google Tag Manager (GTM) is, you need to understand what website tags are.
If you’re using digital marketing, you must be using Google Analytics to track and analyze various metrics. This can be your website traffic, user behavior, user age group, demography, etc. Now the question is, how does Google Analytics help you track these metrics?
If you have ever tried setting up a Google Analytics account, you’ll know about the tag that you need to paste on your website. This tag helps Google track various metrics on your website.
The information you get by monitoring these metrics can be super helpful in optimizing your digital marketing strategies to boost your conversions.
But the problem is that managing these tags and code snippets can be very confusing, especially if you’re a non-techie. So you might end up using them incorrectly. This can result in faulty analytics. As a result, your decision-making process might get affected, which in turn can hamper your business.
Google Tag Manager helps you solve these problems. With it, you can manage these codes and tags more efficiently. But that’s not it. There are several other benefits of using Google Tag Manager too.
Let’s look at a few of them in the following section.
Benefits of Using Google Tag Manager
As mentioned above, Google Tag Manager can help you handle your tags and codes more easily and efficiently. If you’re a non-techie, then it can be quite helpful for you. Here are a few ways you can benefit from it.
Limit Developer Involvement
With GTM, you don’t need to rely on your developers for every little job. It offers a user-friendly interface to create, edit, and publish tags on your website.
You can use it to update tracking codes, analytics scripts, and other marketing tags on your website without modifying its underlying code.
So now you can be more involved in your website tracking and analytics setup while saving all the money you would otherwise spend on hiring a developer for every little thing.
Multiple User Account
If you have a huge team, you can easily create multiple workspaces for your team members.
Each member can work on these workspaces simultaneously without overwriting each other’s progress.
The good thing about GTM is that it only allows authorized members to make or approve changes to the setup.
Tag Storage and Management
Another major benefit of using GTM is that it consolidates all the marketing and tracking codes in one place.
It then injects these codes into your website as – and when – needed. This makes it very convenient for you to add, remove or update your tools with fewer errors.
Compatibility with Tools
GTM is compatible with various third-party marketing tools and analytics platforms. So you can easily add them to your website code using code snippets and existing templates.
How to Set up Google Tag Manager
Now that we know about the benefits of using GTM, let’s take a quick look at how you can set it up.
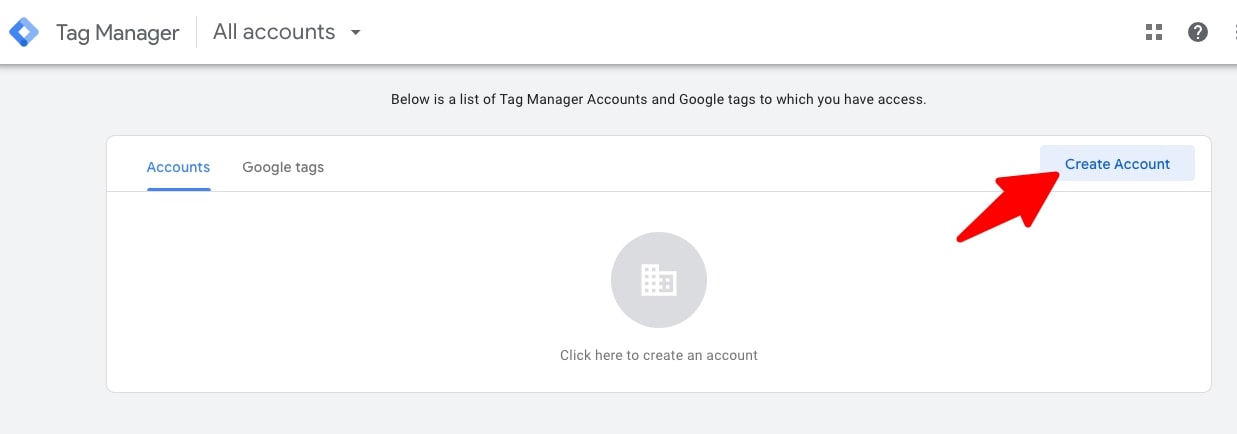
To get started, you’ll first have to log in to your Google account and navigate to Tag Manager. Now click on Create Account.
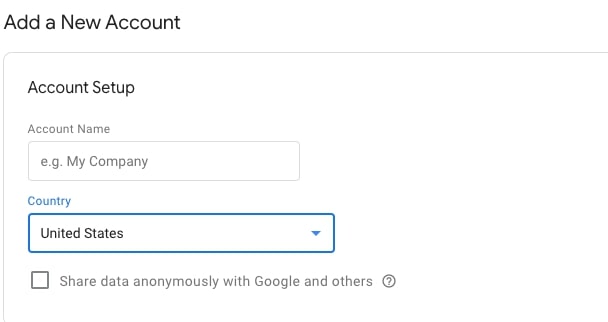
In the next step, add your organization’s details as prompted by GTM. In the first section, you need to add your business name and select your location.
In the next section, enter the container name and select your target platform. The container name is the code that you’ll have to add to your website later to get GTM to start working.
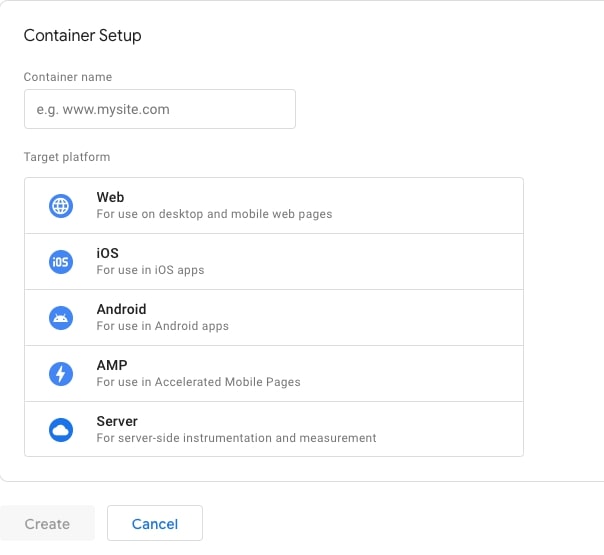
Now click on the Create button.
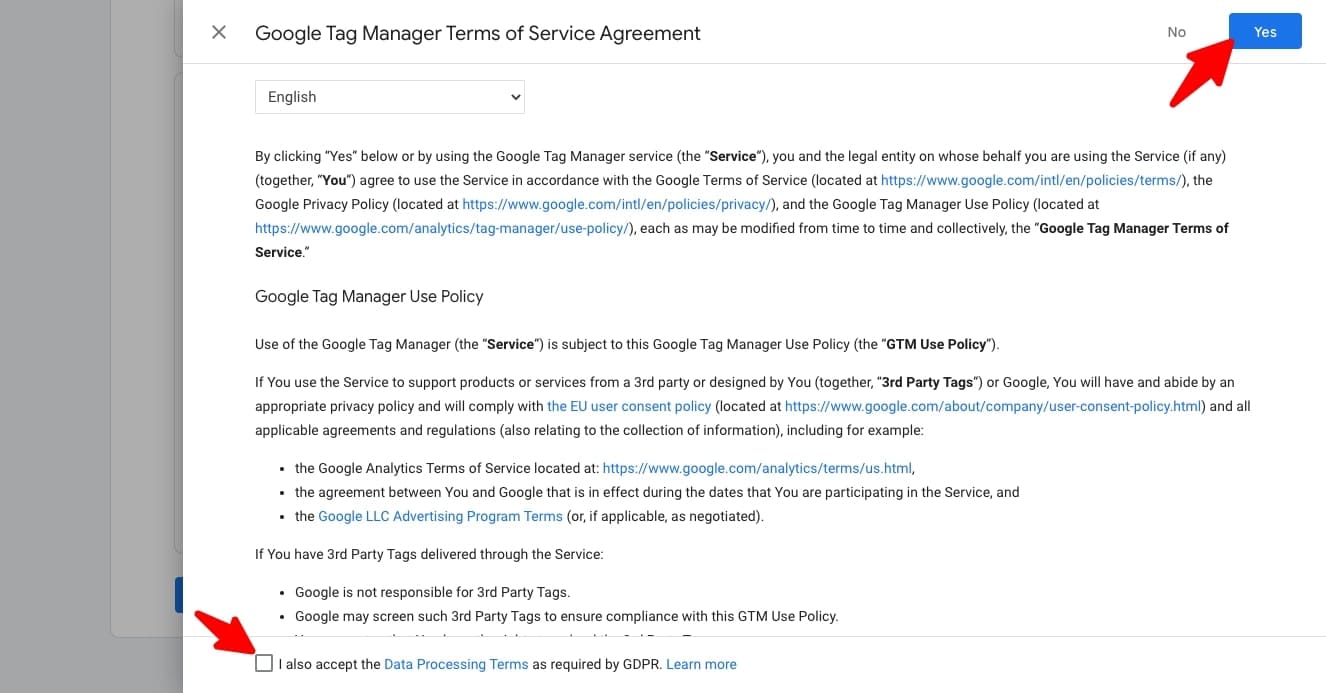
In the next step, agree to the service terms by clicking on the Yes Button at the top of your screen. Don’t forget to check the box at the bottom of your screen.
Once you do that, you’ll see a popup displaying a code snippet to add to your site to install GTM.
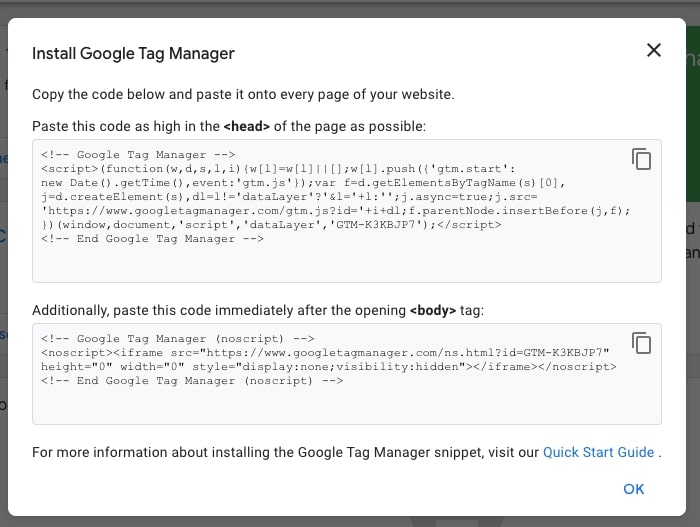
The first code snippet uses JavaScript to extract information. Place that snippet in the <head> section of your website pages.
The second snippet is an HTML iframe. Place that code immediately after the opening <body> tag on your web pages.
Once the installation is done, you’re ready to start using GTM for your business. Now let’s understand how to optimize your GTM for the best results.
How to Optimize Google Tag Manager
If you want Google Tag Manager to work best for you, you need to focus on a few things. By working on these things, you can easily optimize it and get the best results for your business.
Now let’s look at a few points to understand how you can optimize Google Tag Manager and make it work in your favor.
Minimize the Use of Variables and Tags
Just like using a lot of code on your site can slow it down, using a lot of tags and variables can negatively impact the way GTM works. This, in turn, can slow down your website’s performance.
You can prevent this from happening by minimizing your use of variables and tags on Google Tag Manager. The best way to do that is to review your tags and variables regularly.
Every time you spot a tag or variable that isn’t in use anymore, make sure to remove it immediately. Some businesses fire tags on every page and event of the website.
But that may not be necessary for your business. So if you have set them to Page View, it can be a smart thing to change it to Window Loaded.
Also, the variables you use on GTM are calculated on every page. To prevent this from happening, you can do the following:
- Store your calculations in local or session storage. This makes it easier for quick retrieval when needed
- Use if statements on document.location to only do the complex calculation when necessary
- Ask your developer to provide the variable server-side (don’t hesitate to reach out to your developer for complex things like this)
Use a Custom Template
When you start using Google Tag Manager, you’ll notice that it offers various pre-built tag templates for its users. But there is another option where you can create your own custom template as well.
Instead of using the templates offered by GTM, opt for the second option, where you can create your own custom template. These custom templates can be designed with reusable tag configurations. Using these tag configurations can be helpful in several ways.
First, it can help you save your valuable time. Second, it can make things more efficient for you. Third, it can help you keep your interface more secure.
And fourth, it can instantly improve your website’s performance as well. Let me explain how.
When you use the HTML tag instead of the template tag, the GTM script will have to go through your page all over again, insert the script and evaluate the actual script.
This hampers your website performance and can cause it to slow down. Using a custom template can prevent that from happening.
Enable Preview and Debug Mode
Another brilliant way to optimize your Google Tag Manager is to enable preview and debug mode. By enabling the preview mode, you can test your tags before they go live on your website.
This will help you spot any errors or faulty tags that you might have mistakenly added. By identifying them on time, you can prevent any performance problems by correcting the tag before it goes live.

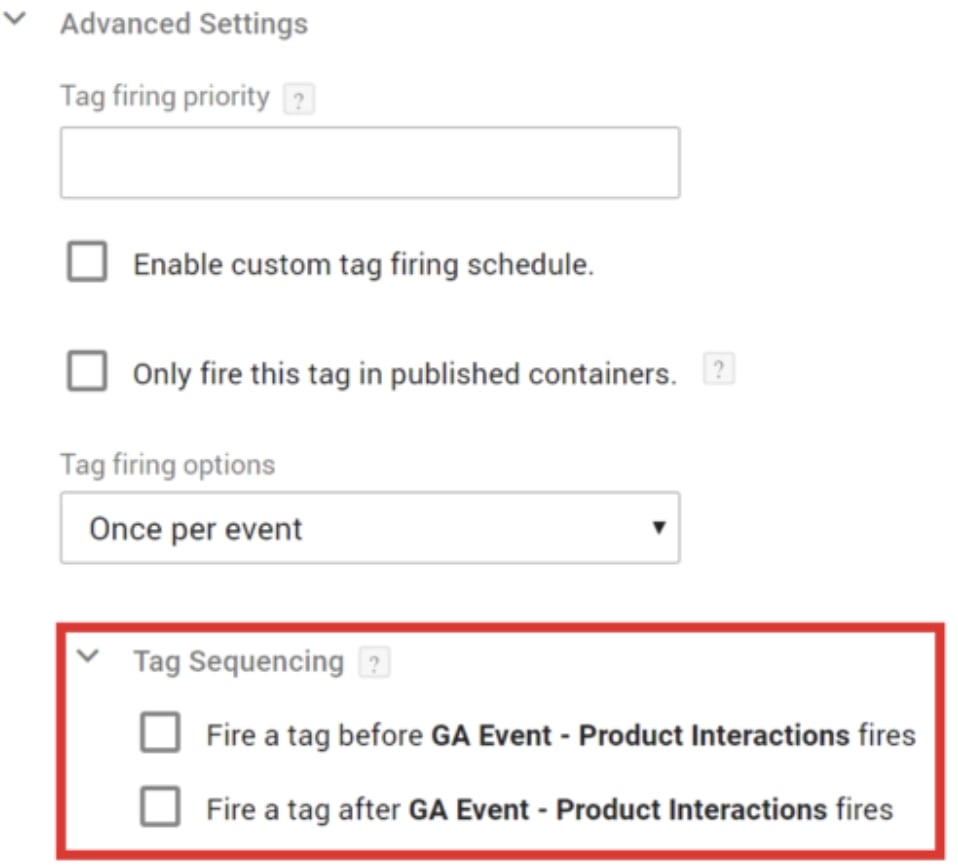
Use Tag Sequencing
One of the features of Google Tag Manager allows you to add tag sequencing. By using this option, you can ensure that your tags are fired in a specific order. The purpose of using this option is to facilitate a sequential firing of tags.
So you can group a certain number of events together. When you do that, GTM will automatically ensure that a tag starts executing only after the main tag or the primary tag has been successfully executed.
You can set it in a way that your tag fires immediately before or after the primary tag has fired.
So what are the benefits of using tag sequencing? Google Tag Manager typically comes with an asynchronous nature. This gives you little to no control over how your tags fire. But when you use tag sequencing, you can have more control over how your tags fire. This option allows you to fire up to 3 tags in sequential order.
Use Version Controls
Google Tag Manager also allows you to use version control as one of its features. This feature allows you to track any changes done to your setup. It can be a wonderful way to identify and analyze problems and troubleshoot them more easily and conveniently.
Another benefit of this feature is that every time you make changes to your setup, it will automatically save the previous version. So if you want, you can restore it at any time. It also keeps your tags organized.
Have a Process to Add or Remove Tags
It is to be noted that your tags will accumulate and leave the unused variables behind. It is important that you remove these unwanted wastes regularly from time to time. Have a proper process to get them removed regularly so that it doesn’t affect your website’s performance.
You can do that by going to the Advanced settings, where you can set a limit to your campaign tags by using the custom tag firing schedule.
Caching
Do you know that your files are stored in your browser’s memory? And if these files haven’t been changed for a long time, they are served from the browser’s cache.
A lot of sites use the exact same scripts. But over the years, individual websites no longer serve these scripts. Instead of these websites, various data centers from Google step in.
Now, if your website is using JQuery or Bootstrap, your users might already have access to that library in their browser cache.
If you want to access these files from the cache, you can do it through the Google server instead of your own server. This will keep your performance intact. If you’re using CDN, you can also cache your GTM container there.
Use Folders in Google Tag Manager
Another brilliant way of optimizing your Google Tag Manager is to use folders. By creating different folders, you can organize your tags, variables, and triggers into logical groups. This helps you manage your tags more conveniently and easily.
You can create them in different ways. For example, you can keep a folder for your ad campaigns, your new project, different teams, etc.
Conclusion
In conclusion, Google Tag Manager is a free tool that every business should leverage to track their tags and manage their codes more efficiently. With this tool, you can track your website metrics and utilize them to optimize your marketing strategies and boost your conversions.
But for all that to happen, you also need to first ensure that your GTM is well-optimized. This will help you ensure that your data is accurately collected. When the collected data is accurate, you can make more informed business decisions. This is very important for the long-term success of your business.
So if you’re using Google Tag Manager for your business and haven’t considered optimizing it, you should work on it now. It’s very important if you want to get good results from your marketing strategies and achieve your goals on time.